1. Dress/ Blouse

Apply interfacing to the wrong side of facing pieces.

Match facing pieces up at the shoulder seams, pin together and stitch.

Press seams open. Serge or overlocked line as shown.
 Pin and stitch the shoulders together with right sides of fabric as shown.
 Then pin the facing to the neckline, with right sides together.
 Sew them together along the top of the neckline with a nice curve as shown.
 After sewing, cut out the edges to only a few mm as shown.
 Turn it inside out, press the neck-line. and Give the top stitching as shown.
Using your CB (center back line) as a guide, lay your left piece overlapping the right piece and pin in place. Sew the baste stitch.


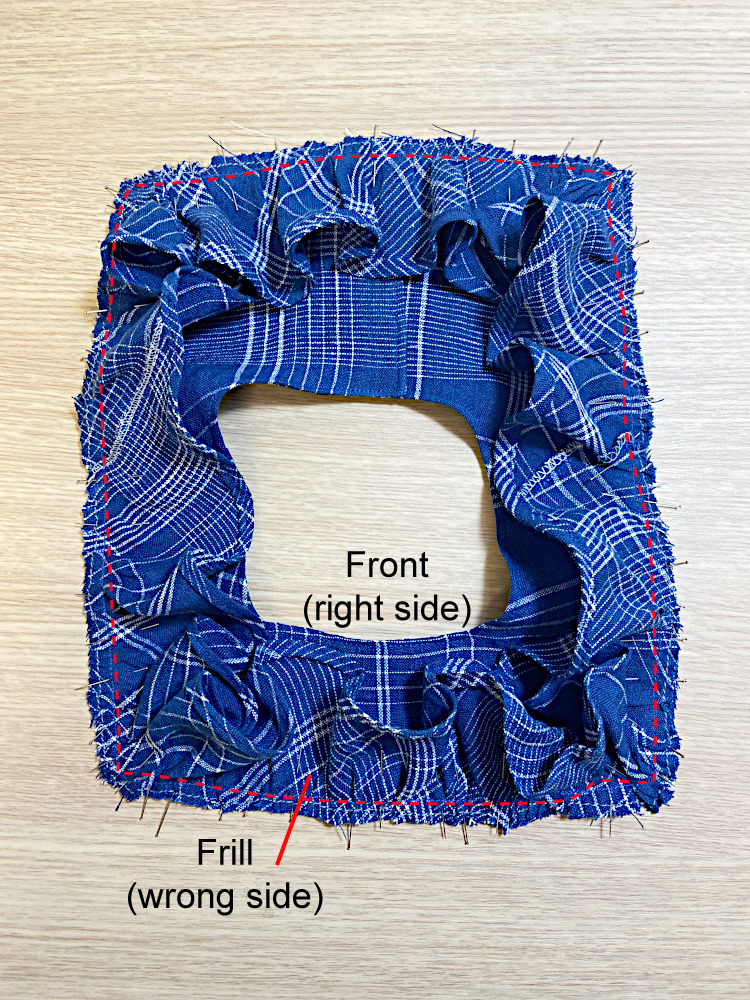
Gathering the frill.


Serge or zigzag stitch the shoulders as shown.

Trim away on corner as shown.


To gather the dress fabric simply hold the fabric still in one hand and pull one of the loose threads with the other. Do this on both sides until your dress is the same width as the front or back bottom edge.


Stitch the dress to the bodice with right sides together as shown.
Serge or zigzag stitch the seam allowance.


On the wrong side of sleeves, fold twice concealing the cut edge and press.
Sew the hem of sleeve as shown.


Stitch sleeves and armhole together as shown. Serge them together.

Pin and stitch the front and back together as shown, right sides of fabric together.
Serge or overlock them together.
 Fold the 1cm(3/8”) from the raw edge to the wrong side and then 1.5cm(9/16”) again.
Then edge stitch it as shown.

Hand stitch the buttons.
2. Romper


Pin and stitch the front and back together as shown, right sides of fabric together.
Serge or overlock them together.


And edge stitch along the leg line as shown.

Pull the elastic band trough the tunnel with the help of a safety pin.

Do a small stitch the elastic band to the beginning and end of leg line at both sides to fix as picture shown.


On the wrong side of placket, fold 2cm/3/4 inch twice concealing the cut edge and press.
Sew the croth line as shown. Repeat with the other side.

Add snaps to the front and back placket.

Hand stitch the buttons.
댓글
댓글 쓰기