Fold the 1cm(0.4”) from the raw edge to the wrong side and then 1.5cm(0.6”) again.
Then edgestitch it as shown. Repeat with the other piece.
******** Front pants ********
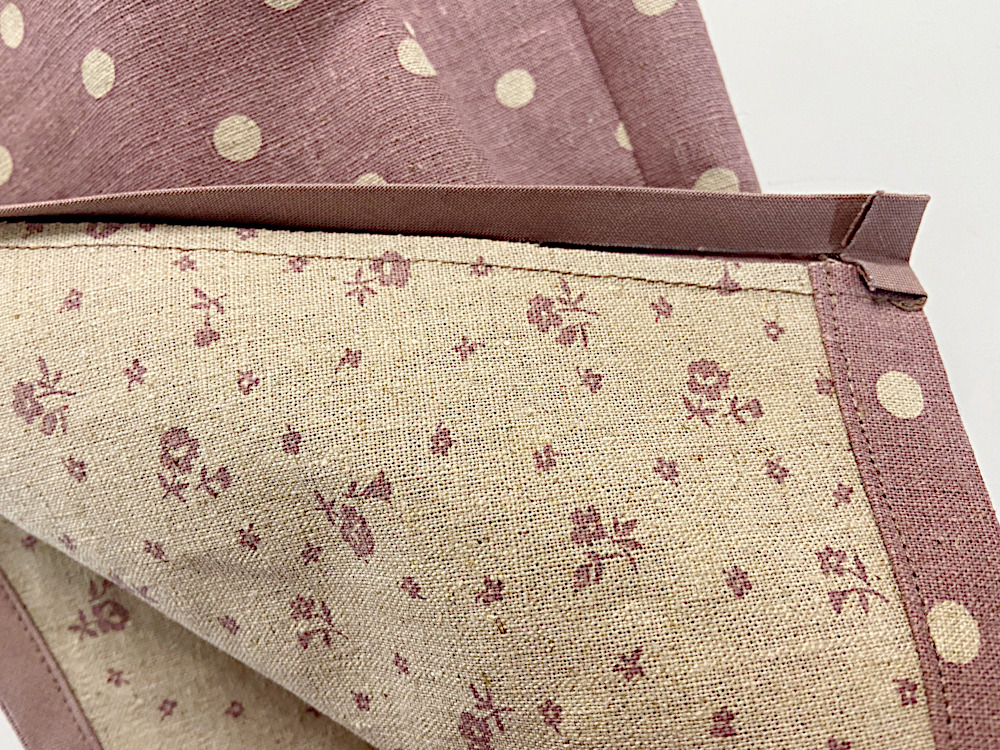
Sewing Single-Fold Bias Binding
 1. Press 0.4″(1cm) bias bindings in lengthwise.
 2. Leave 0.4”(1cm) both edge of binding. Working from the right side of the garment, pin and sew binding to garment aligning the raw edges as shown.
Trim the points on any sharp angles and cut half of the seam allowance along the curve.
3. Fold the extra 0.4”(1cm) binding to the inside of the pants hem.
4. And fold the binding to the inside of the pants, rolling the seam line in slightly to hide it on the inside of the pants. Fold the raw edge of the binding under along the line you pressed earlier, and pin this fold to the inside of the inseam line. Continue to press the binding to the other side.
Topstitch the binding to the inseam line close to the inside fold.
********* Back pants *********
Sewing Double-Fold Bias Binding
1. Press 0.4″(1cm) and press 0.4″(1cm) bias bindings again in lengthwise.
2. Leave 0.4”(1cm) both edge of binding. Working from the right side of the garment, pin and sew binding to garment aligning the raw edges as shown.
Trim the points on any sharp angles and cut half of the seam allowance along the curve.
3. Fold the extra 0.4”(1cm) binding to the inside of the pants hem.
4.Press the binding and seam allowances upward, away from the garment. Fold the binding into the garment so that it just covers the seam you just sewed. Pinning from the outside of the garment, secure the folded edge of the binding by catching it with the pins just below the edge of the binding seam.
Topstitch the binding to the inseam line close to the inside fold.
Add snaps to the front and back placket.

 1. Press 0.4″(1cm) bias bindings in lengthwise.


댓글
댓글 쓰기