
1. Pants

Serge or zigzag seams at the edge as picture shown.

Serge or zigzag seams at the edge as picture shown.

Serge or zigzag seams at the bottom edge as picture shown.

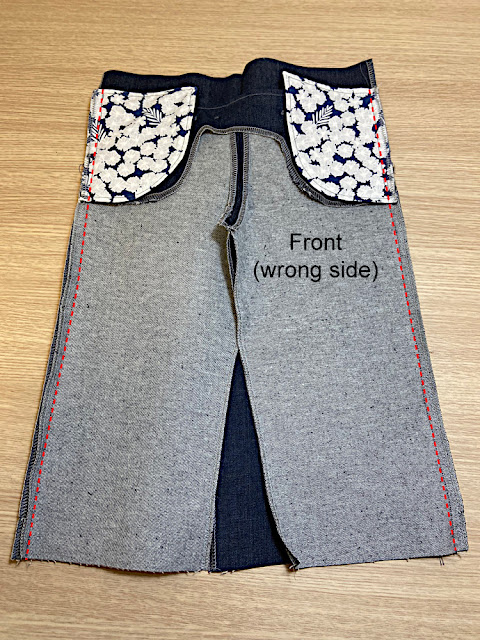
With the right sides together, align and pinch front rise(crotch seam)of the two front pants, and stitch the rise with a 3/8" seam allowances as needed to help the curved seam lie flat.

With right sides together, align and pin the front facing to the front pants panel.
Then stitch the front facing to the pants with 3/8" seam.

Trim the points on any sharp angles and cut notches in the seam allowance
along the curve as shown.

Turn the facing to the wrong side of the pants.
Edge stitch the front facing along the sewn edge.

With right sides together, align and pin two side-front panels, Stitch the top and inside curved edges with 3/8"seam, leaving the outside edge unstitched, as shown.

Trim the seam and the stitched corner.
Turn the side-front panel right side out.

Edge stitch the side-front panels along the sewn edges as shown, pivoting the corner

Pin the front panel the side-front panels, matching the notches at the side seams to the bottoms of the
side-front panels and positioning the side-front panel. You can confirm that the pieces are positioned correctly by looking to see that the button-placement makings you transferred from the pattern to the side-front panels are located near the outer edge of the button holes on the front panel.
Baste the side-front panels to the front panel at the side edges with a 3/8" seam, as shown.

Make button holes as shown.

With the right sides together, align and pinch back rise(crotch seam)of the two back pants, and stitch the rise with a 3/8" seam allowances as needed to help the curved seam lie flat.
With right sides together, align and pin the front and back pants panel.
Match the top edge of the front panel to waistband notches on the back panel, as shown.
Stitch the side seams with a 3/8" seam.


Clip into the seam allowances of the front panel, just below the side-front panel to release the seam allowance. The press the side front panel's seam allowances toward the back panel, and press open the seam allowances below the side-front panel.
Press the seam allowances for the back panel that rise above the front panel the back.

Fold and press the top of the back panel toward the wrong side of the back panel by1cm( 3/8"). Press and fold this edge a second time by 2cm(3/4") to from the casing for the elastic at the back waist.


Edge stitch the casing's lower fold.
The casing will be open at both ends so you can feed the elastic through it.

Use a bodkin or safetypin attached to one end of a length of 3/4" elastic band through the waist band casing.

Stitch through the waistband from the right side to secure both ends of elastic.
Then trim the extra elastic from the waistband at the inside, near the stitching,


With right sides together, pin the inseam of pants together, matching the raw edges and the seam of rise(crotch seam).
Then stitch the inseam separately on each leg, starting at the hem of the pants on one leg and sewing toward the rise. Turn the rise seam allowances out of the way, and stop stitching when you reach the rise seam, back stitching at the end of stitching. Sew the opposite leg inseam in the same way. By sewing the inseam this way, you'll leave the front and back seam allowances of he rise unseen, which will help the pants drape better when they are worn.
Press the in seam seam allowances open, and finish the seam allowances as desired.


Hand stitch buttons on the side front panels on the makings that you transferred from the pattern piece.
2. Overalls

Serge or zigzag seams at the edge as picture shown.

Serge or zigzag seams at the edge as picture shown.

Serge or zigzag seams at the bottom edge as picture shown.

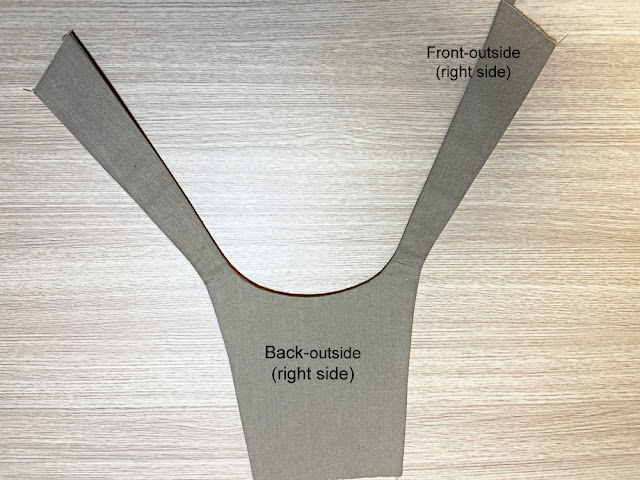
Pin and stitch the front pieces together as shown. Right sides of fabric together.

Pin and stitch the back pieces together as shown. Right sides of fabric together.

Press the seam allowance to one side.
Pin the seam in place. The final step is to stitch the seam down.
The stitch should be parallel to the initial seam and about 1/3″ wide.


Repeat the back piece as front piece.


Then fold and pin in half line with the right side and sew down the short side as shown.
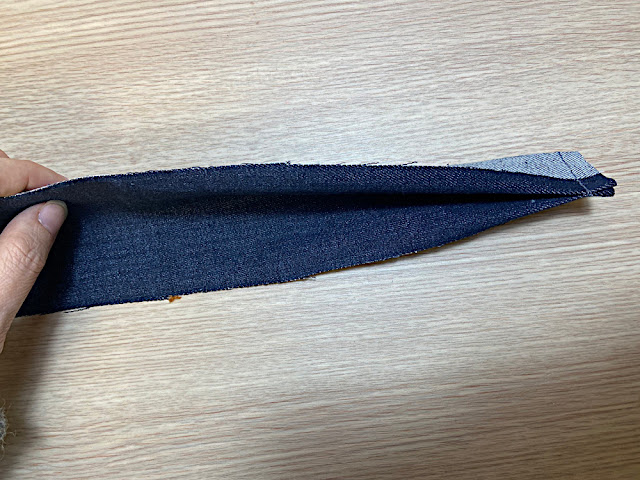


After sewing, cut out the edges as shown.

Turn it right side out. Refold each one in half along the long edge and press.
Open the fold and fold each raw edge into wards the center and press again.
And edge stitch at top end and along length of strap.
Repeat with the the other strap .

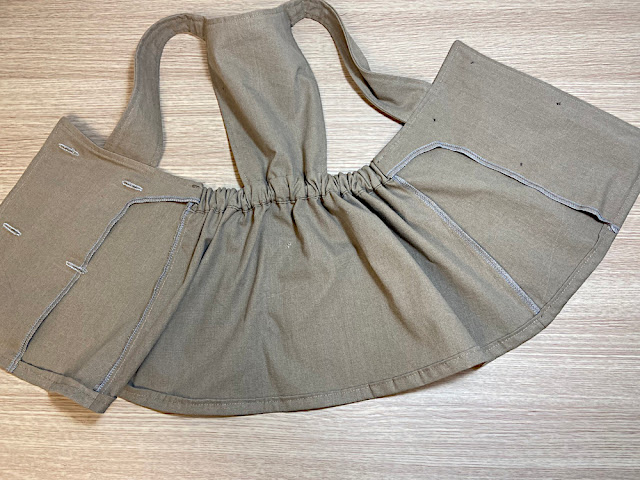
Pin straps on the back in place as shown.

Sew the baste stitch with straps and Top front for fixing each other as shown.


Match the back and back facing together. Face the right sides together.
Pin & sew across the top to secure the straps in place.
Making sure that the straps are tucked in nicely between two pieces ,
sew down each side as shown.

Trim the points on any sharp angles and cut notches in the seam allowance
along the curve as shown.

Topstitch all the way around as picture shown (red line).

Match the front and front facing together. Face the right sides together.

Topstitch all the way around as picture shown (red line).
With right sides together, align and pin two side-front panels, Stitch the top and inside curved edges with 3/8"seam, leaving the outside edge unstitched, as shown.
Trim the seam and the stitched corner.
Turn the side-front panel right side out.
Edge stitch the side-front panels along the sewn edges as shown, pivoting the corner.

Serge or zigzag seams at the side line as picture shown.

Pin the front panel the side-front panels, matching the notches at the side seams to the bottoms of the side-front panels and positioning the side-front panel.
You can confirm that the pieces are positioned correctly by looking to see that the button-placement makings you transferred from the pattern to the side-front panels are located near the outer edge of the button holes on the front panel.
Baste the side-front panels to the front panel at the side edges with a 3/8" seam, as shown.

With right sides together, align and pin the front and back pants panel.
Match the top edge of the front panel to waistband notches on the back panel, as shown.
Stitch the side seams with a 3/8" seam.

With right sides together, pin the inseam of pants together,
matching the raw edges and the seam of rise(crotch seam).
Then stitch the inseam separately on each leg, starting at the hem of the pants on one leg and sewing toward the rise. Turn the rise seam allowances out of the way, and stop stitching when you reach the rise seam, back stitching at the end of stitching. Sew the opposite leg inseam in the same way. By sewing the inseam this way, you'll leave the front and back seam allowances of he rise unseen, which will help the pants drape better when they are worn.
Press the in seam seam allowances open, and finish the seam allowances as desired.
Fold press each pants leg's bottom edge twice to the wrong side-first, 3/8" and 3/4" to encase the raw edge inside the folds. Edge stitch the upper folded edge to Finnish the hem.

Hand stitch buttons on the side front panels on the makings that you transferred from the pattern piece.
3. Skirt


Pin and sew the shoulders together with right sides of fabric together.
Repeat with lining fabric too. Iron seams open.

You should have 2 seperate fronts and backs now (one is outer fabric, the other one is lining fabric). Now with the right sides of the fronts and backs facing each other, sew along the neck line and front and arm hole line as shown. The things that will be left unsewn is the hem line and side lines.

Cut notches in the seam allowance
along the curve as shown.
Through the back hem line, turn the piece right-side-out.
Press the edges as shown.

Edge stitch the front and back along the sewn edge.

Press 3/8″(1cm) bottom edge of back facing in lengthwise as shown.


Match the skirt to bodice waist line with right sides together as picture shown.
Using your CB (center back line) as a guide, lay your bodice.
Then lay your back skirt facing skirt with right sides together.

Stitch the top seams with a 3/8" seam as shown.


And fold the facing to the inside of the back-skirt,
rolling the seam line in slightly to hide it on the inside of the garment.
Topstitch the binding to the neck line close to the inside fold.


Using a safety pin, thread your elastic through the Back casing.
Before the end of the elastic is about to be pulled completely into the casing, sew up the waistband along the same line as the skirt’s side seam catching about a 1/2” of the elastic.
Continue pulling the elastic through until it’s about 1/2 “ past the other side seam.


Serge or zigzag seams of front skirt at the round edge as picture shown.

With right sides together pin front piece into place on front skirt.


With right sides together, align and pin the front skirt facing to the front skirt.


Then stitch the front skirt facing to the skirt with 3/8" seam as shown.

Repeat with the other side.


Trim the points on any sharp angles as shown.

Trim the points on any sharp angles as shown.
Turn the front skirt facing right side out.

Face the right sides of skirt together. Pin along the side lines.

Then fold the side seam of front skirt facing to the back side as shown.


Pin it on skirt.

Face the right sides of skirt together. Pin on and stitch along the side lines.
Serge or zigzag red line at the edge as shown. Press seams towards back.


On the wrong side of skirt, fold 1cm(3/8") and 1.5cm(5/8")
concealing the cut edge and press.

Sew the hem of skirt as shown.
댓글
댓글 쓰기